This is not meant as a step-by-step guide of how these are put together but just a showcase of the work being done for this game and the projects each team member is creating.
Blueprints is the base coding language for Unreal Engine 5; it is a high-level visual scripting language that uses C++ as the actual language. Blueprint uses nodes and connection to run all the code; it is similar to other visual languages like Simulink in MATLAB.
Blueprints have been used for a multitude of applications inside Fractured Dream. Most game systems use blueprints as the code behind them, and this portfolio will just go through a few.
- Player character
- Inventory system
- Interaction system.
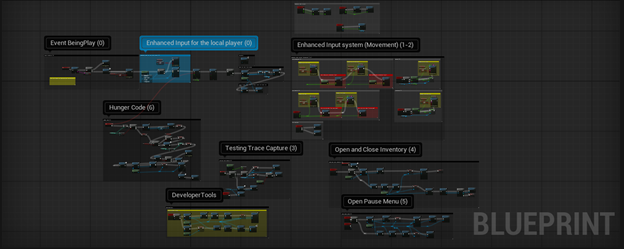
Starting with the player character blueprint, this holds, currently, all the information about the player itself. How the player can move, what movement type the player is currently in (swimming, falling, walking, and so on), stats about the player (hunger, health, inventory contents), and widgets (Unreal Engines form of a UI system) that can be accessed from the player.
The player systems are relatively simple; they just combine many different systems into one persistent component that can be easily accessed by other blueprints.
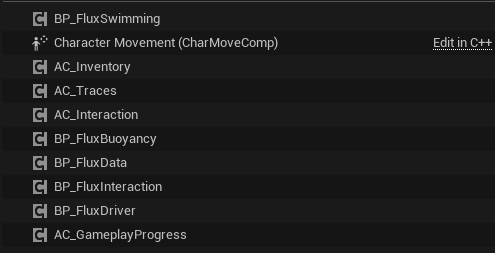
Shows a list of the AC (actor components) held inside the player character.
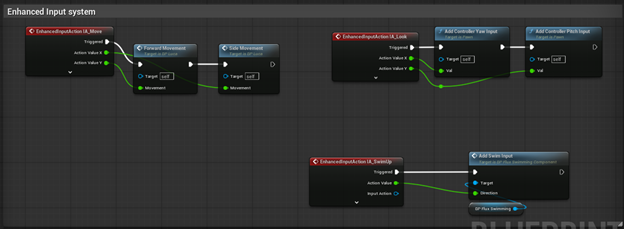
Giving the player access to different AC’s allows very easy access to the variables and functions inside the ACs. The player has a few main functions already listed above; to start the movement system uses Unreal Engine new enhanced movement system, this uses a series of inputs defined by data assets that store a bit of information.
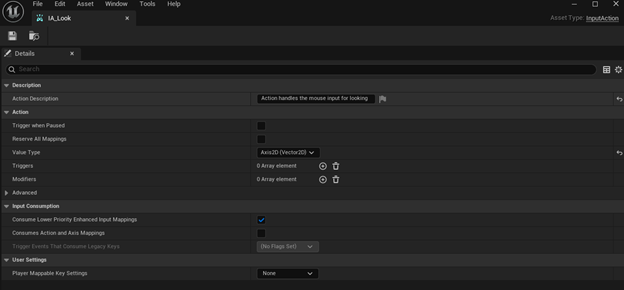
Example of an input that is used, this one is for looking around the game.
After creating all the inputs, using an input mapping context (IMC), which takes the inputs just created and maps them to keyboard or mouse triggers
Here is the IMC for the main player character.
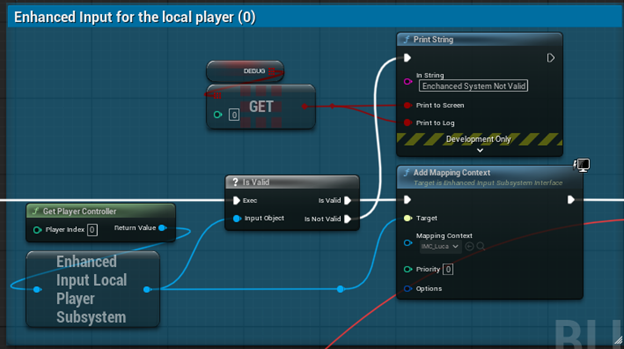
Then the blueprint script to trigger these inputs are very simple, just add the mapping context to the player controller when initializing the game and then just use the enhanced input event to trigger the add movement scripts.
That is the entire movement system at a high level.
For the next system to talk about is the statistic system. Currently this is mainly the hunger function which is built of a timer. Quick note, both the health and hunger values have a maximum of 100. Every 18 seconds the hunger function runs, which is very simple, all it does is lower the hunger value by 1, set that value as the new hunger value, change the HUD widgets hunger bar, then check if the hunger value is above 0, if it’s not, the lower the health by 25.
The lowering health is a bit different because I wanted a longer time in-between than 18 seconds if the health should be lower, to give the player a bit extra time to eat. To achieve this while still calling the function every 18 seconds, I have a retriggable delay (when triggered a retriggable delay restarts its countdown or delay) that is only triggered if the hunger is above 0, if it is not above 0 the delay will not be triggered which allows the input to go through and lower the health.
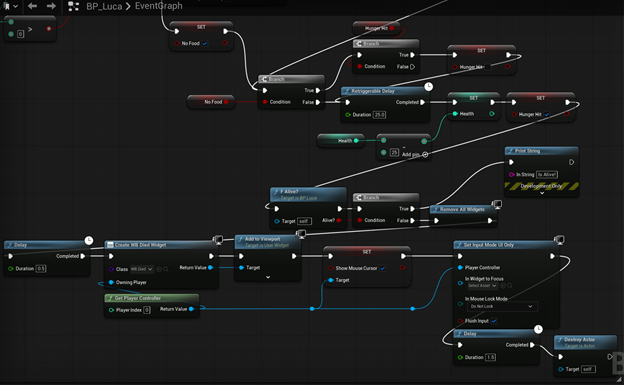
This shows the lowering health code with the retriggereable delay
When the health is lowered a condition is checked after which sees if the player has more than 0 health, if not then a death screen widget is put on screen and the game is paused. This sums up all the current statistic systems that are separate from the interaction system and inventory system. Which are the next two systems to be presented
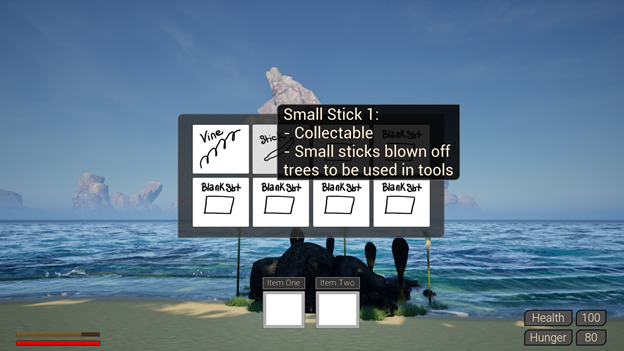
These next systems are by far the most complicated systems currently in the game. We will first start with an overview of the actual inventory system itself. The inventory is store inside an array in the AC_Inventory component on the player character. The array’s elements are a structure which was created separately that holds the item name and quantity, this represents each item inside the inventory on a per slot bases. The inventory grid, which is what is displayed to the character, takes this inventory array and for each element adds a child to the grid component inside the inventory grid. This creates that 2by4 grid shown below, as the default number of inventory slots is 8.
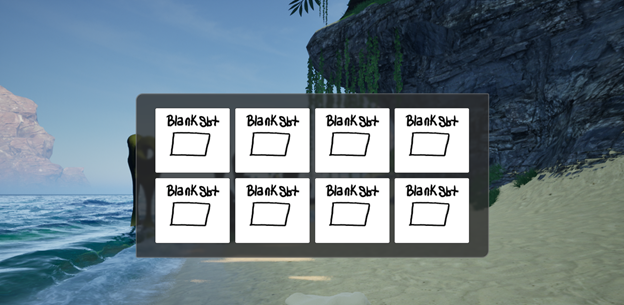
This is the grid showing how the empty inventory looks
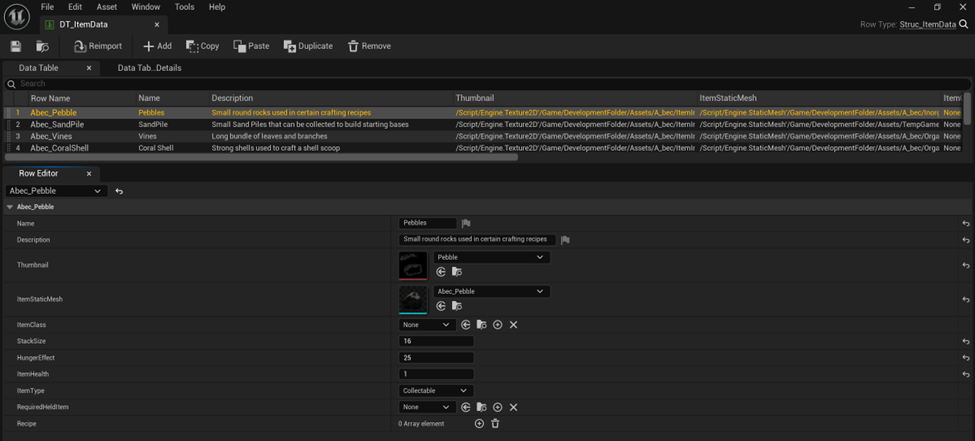
There is another data table being used to display all the correct information. Each row of this data table is set up with a structure as well that holds all the information for each specific item. Things like item name, max stack size, thumbnail, if it’s food, or equipment, if it is craftable what is its recipe. Each interactable item in the game has to have its own row inside this data table. Here is where the system really starts to work well, Using the name from each inventory slot from the inventory array we can get the row that corresponds to that name. This gives all the information required for each inventory slot, this information is what generates the pictures and the tooltips for each item as shown below.
This is how the bulk of the inventory system works; I won’t go into detail about removing, adding, or crafting and all those other systems for the inventory as they all work the same and it is just about locating and changing the values inside this inventory array. Remove an item, remove that item from the array, add an item, add that item to the array, and so on. Crafting was a bit more tricky to get all the widgets to correctly display the information in an intelligent manner, but it was the same process of getting values from that array.
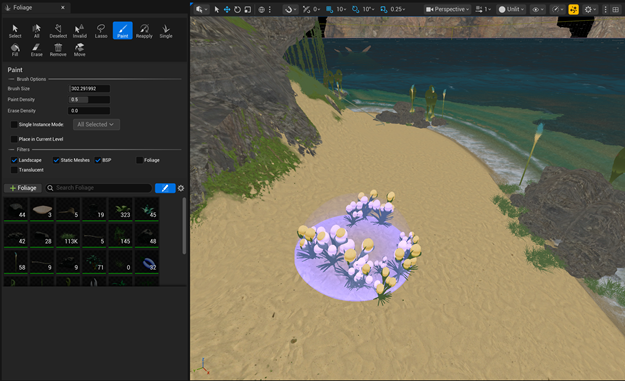
The next more interesting part of this system is the interaction between the player and objects in the game world. I used something called foliage instanced static mesh component of FISMC for short. This adds a specific component to each instance of the foliage. The foliage was placed by the Unreal Engine foliage painter tool, which allows me to create foliage types and paint them into the world. It is extremely efficient way of having thousands of interactable items at the same time.
I used a line trace to detect where the player was looking and then when they left click on an interactable object, the FISMC is triggered which contains the static mesh that is hit and the index inside the instanced mesh array that was hit, this gives all the information to find all the data required to edit those same arrays as before, the inventory array.
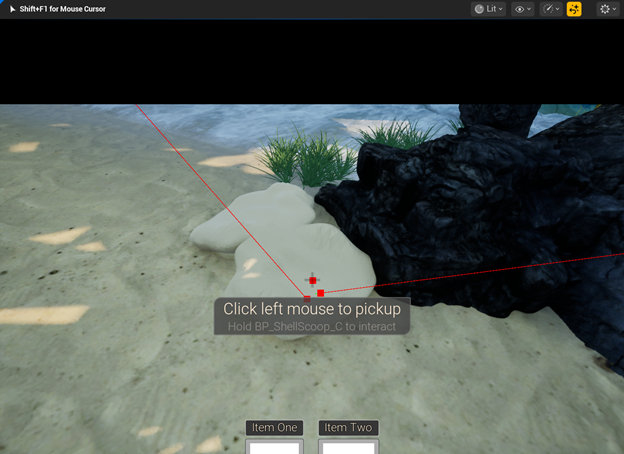
The red lines are the line traces coming from the player view hitting an interactable object.
As stated, before the name of the item is what drives the which row of item data to gather, which this name is stored inside of the inventory array, this name is the only piece of code I have to worry about being correct when adding new items. The way I did it is that the row of the data table must match exactly to the name of the static mesh in the editor, this way when I hit a static mesh using the line trace as stated before I can just use the name and get the correct item data. This is the entire interaction system and inventory systems at a high level as it is currently in the game, while there is much more that goes into the actual system this is everything to understand how it works at a high level.
Some other blueprint applications inside Fractured Dream that have existed are the triggering of certain events based on things that happen inside the game. For instance, when the game hits night, a whole set of particle systems and glowing effects take place to give the night a beautiful different ambience. When the player gets close enough to some plants, particle systems spawn on the plant to give a bit more life into the world. Lastly, in certain areas some triggers cause certain music to play. These are very simple gameplay triggers but they add a lot of interaction with the world itself for the player to explore and keep them engaged thoroughly.
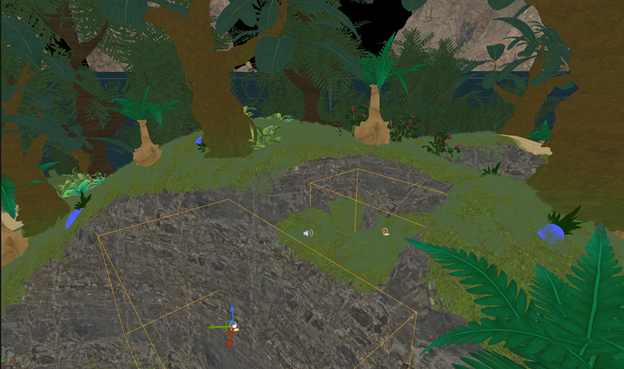
The yellow boxes shown here are just two of the triggers placed inside the game.